Next.js 15 Server Actions Tutorial – Build Full Stack Apps
Next.js 15 Server Actions
In the past, building a full-stack app meant managing two different codebases — one for the frontend and one for the backend. But with Next.js 15 Server Actions, that’s no longer needed. Thanks to Server Actions, we can run database queries, handle forms, and write API logic right inside the React components — no need for a separate Express server anymore.
In this tutorial, we’ll build a task manager app using Next.js 15 and Server Actions.
Prerequisites
Before we start, make sure we have:
- Node.js (v18.17 or higher)
- Basic understanding of React
- PostgreSQL installed locally (or a free account on Railway/Supabase)
Check your Node version:
node --version
npm --version
Both should return version numbers.
How Next.js Server Actions Works — No More Separate Backend
Traditionally, a full-stack app need two parts:
- A frontend (React, Vue, etc.)
- A backend (Express, NestJS, Java Spring, etc.)
The frontend sends requests to the backend, and the backend connects to the database.
But in Next.js 15, thanks to Server Actions, this workflow is much simpler.
Server Actions let you write backend logic — like saving a task or updating data — directly inside your React components. That means your “frontend” can also safely handle database operations, all in the same codebase.
Project Setup
Step 1: Create Next.js Server Actions Project
First, open the terminal and run this command to create a new Next.js 15 project using the App Router:
npx create-next-app@latest task-manager-appWhen prompted, choose these options:
✔ Would you like to use the recommended Next.js defaults? YesAfter it finishes, go into the project folder::
cd task-manager-appStep 2: Install Prisma and Other Tools
Next, we’ll add Prisma, which helps us connect and talk to our database easily.
npm install @prisma/client
npm install -D prisma
Prisma is like a “database connector” — it helps us read, write, and update data without writing raw SQL. It also keeps everything type-safe and works nicely with TypeScript.
Then set it up:
npx prisma initThis command creates a new prisma folder with a file called schema.prisma, and also adds a .env file where we’ll store the database URL and credentials.
Step 3: Connect the Database
Open the .env file in the project root and look for this line:
DATABASE_URL="postgresql://username:password@localhost:5432/taskmanager?schema=public"Change the username and password to match your PostgreSQL setup.
If you don’t have PostgreSQL running locally, no worries — you can use a free hosted database from Railway.app or Supabase. Just copy their connection string and paste it here.
Step 4: Create the Database Schema
Now we’ll define our first database table — a simple Task model.
Open the file prisma/schema.prisma and replace everything with this:
generator client {
  provider = "prisma-client-js"
}

datasource db {
  provider = "postgresql"
  url      = env("DATABASE_URL")
}

model Task {
  id          String   @id @default(uuid())
  title       String
  description String?
  completed   Boolean  @default(false)
  createdAt   DateTime @default(now())
  updatedAt   DateTime @updatedAt
}
This defines a Task model with:
- A unique
id - A
title - An optional
description - A
completedflag createdAtandupdatedAttimestamps
Basically, it’s a structure for each task item in your app.
Run this command to apply the schema to your database:
npx prisma migrate dev --name initThis creates a Task table and generates the Prisma Client — a ready-to-use API for reading and writing data in your app.
Step 5: Create Prisma Client Instance
Next, we’ll set up the Prisma client so our app can talk to the database.
Inside your project folder, create a new folder called lib and a file named prisma.ts:
mkdir lib
touch lib/prisma.ts
Then add this code:
import { PrismaClient } from '@prisma/client'

const globalForPrisma = globalThis as unknown as {
  prisma: PrismaClient | undefined
}

export const prisma = globalForPrisma.prisma ?? new PrismaClient()

if (process.env.NODE_ENV !== 'production') globalForPrisma.prisma = prisma
When you run Next.js in development mode, the server automatically reloads every time you make a code change. Each reload would normally create a new Prisma instance, and after a few reloads, this can cause errors like “Too many connections” to your database.
To prevent that, we use a small trick here:
- We store the Prisma client inside a global variable (
globalThis.prisma). - When the app reloads, it checks if there’s already a Prisma instance.
- If yes, it reuses it.
- If not, it creates a new one.
This way, we only ever have one Prisma client running in development — clean and efficient.
In production, the code still creates a fresh single instance (since the app won’t reload repeatedly).
Build Server Actions
Server Actions are special functions that run only on the server, but we can call them directly from the React components — no need to write separate API routes.
They’re marked with the 'use server' directive and are perfect for things like:
- Reading or writing data to the database
- Handling form submissions
- Running any logic that shouldn’t be exposed in the browser
Basically, Server Actions let your frontend and backend live together neatly in the same place.
Step 1: Create the Actions Folder
We’ll create a folder to store all the server actions for our tasks:
mkdir app/actions
touch app/actions/tasks.ts
Step 2: Add Task Actions
Open app/actions/tasks.ts and add this code:
'use server'

import { prisma } from '@/lib/prisma'
import { revalidatePath } from 'next/cache'

export async function getTasks() {
  try {
    const tasks = await prisma.task.findMany({
      orderBy: { createdAt: 'desc' }
    })
    return { tasks, error: null }
  } catch (error) {
    console.error('Failed to fetch tasks:', error)
    return { tasks: [], error: 'Failed to load tasks' }
  }
}

export async function createTask(formData: FormData) {
  try {
    const title = formData.get('title') as string
    const description = formData.get('description') as string

    if (!title || title.trim().length === 0) {
      return { error: 'Title is required' }
    }

    await prisma.task.create({
      data: {
        title: title.trim(),
        description: description?.trim() || null
      }
    })

    revalidatePath('/')
    return { error: null }
  } catch (error) {
    console.error('Failed to create task:', error)
    return { error: 'Failed to create task' }
  }
}

export async function toggleTask(id: string) {
  try {
    const task = await prisma.task.findUnique({
      where: { id }
    })

    if (!task) {
      return { error: 'Task not found' }
    }

    await prisma.task.update({
      where: { id },
      data: { completed: !task.completed }
    })

    revalidatePath('/')
    return { error: null }
  } catch (error) {
    console.error('Failed to toggle task:', error)
    return { error: 'Failed to update task' }
  }
}

export async function deleteTask(id: string) {
  try {
    await prisma.task.delete({
      where: { id }
    })

    revalidatePath('/')
    return { error: null }
  } catch (error) {
    console.error('Failed to delete task:', error)
    return { error: 'Failed to delete task' }
  }
}
The 'use server' at the top tells Next.js these functions must only run on the server.
This is super important because it keeps things like your database credentials and business logic secure, and they never get sent to the browser.
Each function talks to the database through Prisma, which handles all the queries safely.
The revalidatePath('/') tells Next.js to refresh the homepage data after we create, update, or delete a task. With this, the UI always shows the latest info instantly.
Every action returns either { error: null } (success) or { error: 'something' } (fail).
This makes it easy for your React components to check what happened and show proper messages to the user.
Build the UI Components
Now that we have our server actions ready, let’s build the frontend components — the form for adding tasks, and the list for showing and managing them.
Step 1: Create the Task Form Component
We’ll start with the form that lets users add new tasks.
Create the folder and file:
mkdir app/components
touch app/components/TaskForm.tsx
Then add this code:
'use client'

import { createTask } from '@/app/actions/tasks'
import { useRef, useState } from 'react'

export default function TaskForm() {
  const formRef = useRef<HTMLFormElement>(null)
  const [isSubmitting, setIsSubmitting] = useState(false)
  const [error, setError] = useState<string | null>(null)

  async function handleSubmit(formData: FormData) {
    setIsSubmitting(true)
    setError(null)

    const result = await createTask(formData)

    if (result.error) {
      setError(result.error)
    } else {
      formRef.current?.reset()
    }

    setIsSubmitting(false)
  }

  return (
    <form
      ref={formRef}
      action={handleSubmit}
      className="bg-white p-6 rounded-lg shadow-md mb-8"
    >
      <h2 className="text-2xl font-bold mb-4 text-gray-800">Add New Task</h2>

      {error && (
        <div className="mb-4 p-3 bg-red-100 border border-red-400 text-red-700 rounded">
          {error}
        </div>
      )}

      <div className="mb-4">
        <label htmlFor="title" className="block text-gray-700 font-medium mb-2">
          Title *
        </label>
        <input
          type="text"
          id="title"
          name="title"
          required
          disabled={isSubmitting}
          className="w-full px-4 py-2 border border-gray-300 rounded-lg focus:outline-none focus:ring-2 focus:ring-blue-500"
          placeholder="Enter task title"
        />
      </div>

      <div className="mb-4">
        <label htmlFor="description" className="block text-gray-700 font-medium mb-2">
          Description
        </label>
        <textarea
          id="description"
          name="description"
          disabled={isSubmitting}
          rows={3}
          className="w-full px-4 py-2 border border-gray-300 rounded-lg focus:outline-none focus:ring-2 focus:ring-blue-500"
          placeholder="Enter task description (optional)"
        />
      </div>

      <button
        type="submit"
        disabled={isSubmitting}
        className="w-full bg-blue-600 text-white py-2 px-4 rounded-lg hover:bg-blue-700 disabled:bg-gray-400 disabled:cursor-not-allowed transition-colors"
      >
        {isSubmitting ? 'Adding Task...' : 'Add Task'}
      </button>
    </form>
  )
}
This component uses the new form action pattern from React 19 and Next.js 15. Instead of handling onSubmit manually and preventing default events, we directly pass our server action (createTask) to the form’s action prop. When the form submits, Next.js automatically runs that server action on the server.
We also use:
useRefto access the form element so we can reset it after submitting.useStateto trackisSubmitting(for the loading button) anderrormessages for validation feedback.
This makes the UX smoother and more responsive and we no need to reload or refresh the page after submitting a new task.
Step 2: Create the Task List Component
Now let’s display our tasks and allow users to toggle or delete them.
Create the file:
touch app/components/TaskList.tsxThen add this code:
'use client'

import { deleteTask, toggleTask } from '@/app/actions/tasks'
import { useState } from 'react'

type Task = {
  id: string
  title: string
  description: string | null
  completed: boolean
  createdAt: Date
}

export default function TaskList({ initialTasks }: { initialTasks: Task[] }) {
  const [tasks, setTasks] = useState(initialTasks)
  const [loading, setLoading] = useState<string | null>(null)

  async function handleToggle(id: string) {
    setLoading(id)

    // Optimistic update
    setTasks(tasks.map(task =>
      task.id === id ? { ...task, completed: !task.completed } : task
    ))

    const result = await toggleTask(id)

    if (result.error) {
      // Revert if server fails
      setTasks(tasks)
      alert(result.error)
    }

    setLoading(null)
  }

  async function handleDelete(id: string) {
    if (!confirm('Are you sure you want to delete this task?')) return

    setLoading(id)

    // Optimistic update
    setTasks(tasks.filter(task => task.id !== id))

    const result = await deleteTask(id)

    if (result.error) {
      // Revert if server fails
      setTasks(tasks)
      alert(result.error)
    }

    setLoading(null)
  }

  if (tasks.length === 0) {
    return (
      <div className="text-center py-12 text-gray-500">
        No tasks yet. Create your first task above!
      </div>
    )
  }

  return (
    <div className="space-y-4">
      {tasks.map((task) => (
        <div
          key={task.id}
          className="bg-white p-6 rounded-lg shadow-md flex items-start gap-4"
        >
          <input
            type="checkbox"
            checked={task.completed}
            onChange={() => handleToggle(task.id)}
            disabled={loading === task.id}
            className="mt-1 h-5 w-5 rounded border-gray-300 text-blue-600 focus:ring-blue-500"
          />

          <div className="flex-1">
            <h3 className={`text-lg font-semibold ${task.completed ? 'line-through text-gray-500' : 'text-gray-800'}`}>
              {task.title}
            </h3>
            {task.description && (
              <p className="text-gray-600 mt-1">{task.description}</p>
            )}
            <p className="text-xs text-gray-400 mt-2">
              {new Date(task.createdAt).toLocaleDateString()}
            </p>
          </div>

          <button
            onClick={() => handleDelete(task.id)}
            disabled={loading === task.id}
            className="text-red-600 hover:text-red-800 disabled:text-gray-400 font-medium"
          >
            Delete
          </button>
        </div>
      ))}
    </div>
  )
}
This component shows the list of tasks and allows toggling or deleting them with optimistic updates — meaning the UI updates immediately before waiting for the server to confirm.
If something goes wrong (e.g. database error), we revert the UI change and show an alert. We also track which task is currently being updated with loading so that button or checkbox is disabled while the action runs.
This makes the app feel instant and smooth, like a real-time interface.
Step 3: Update the Home Page
Finally, let’s bring everything together.
Open app/page.tsx and replace the content with:
import { getTasks } from './actions/tasks'
import TaskForm from './components/TaskForm'
import TaskList from './components/TaskList'

export default async function Home() {
  const { tasks, error } = await getTasks()

  return (
    <main className="min-h-screen bg-gradient-to-br from-blue-50 to-indigo-100 py-12 px-4">
      <div className="max-w-3xl mx-auto">
        <h1 className="text-4xl font-bold text-gray-800 mb-8 text-center">
          Task Manager
        </h1>

        <TaskForm />

        {error ? (
          <div className="bg-red-100 border border-red-400 text-red-700 px-4 py-3 rounded">
            {error}
          </div>
        ) : (
          <TaskList initialTasks={tasks} />
        )}
      </div>
    </main>
  )
}
Notice there’s no 'use client' at the top of this file — that means it’s a Server Component.
This gives us a few nice benefits:
- The initial HTML already contains your task data (great for SEO and instant page load).
- No “loading” spinner when you first visit the page.
- Database queries happen securely on the server — your credentials never touch the client.
We simply pass tasks down to the TaskList component, which then takes over with optimistic updates for smooth, instant interactions.
Test Your App
Now we are ready to test the app. First, start the development server:
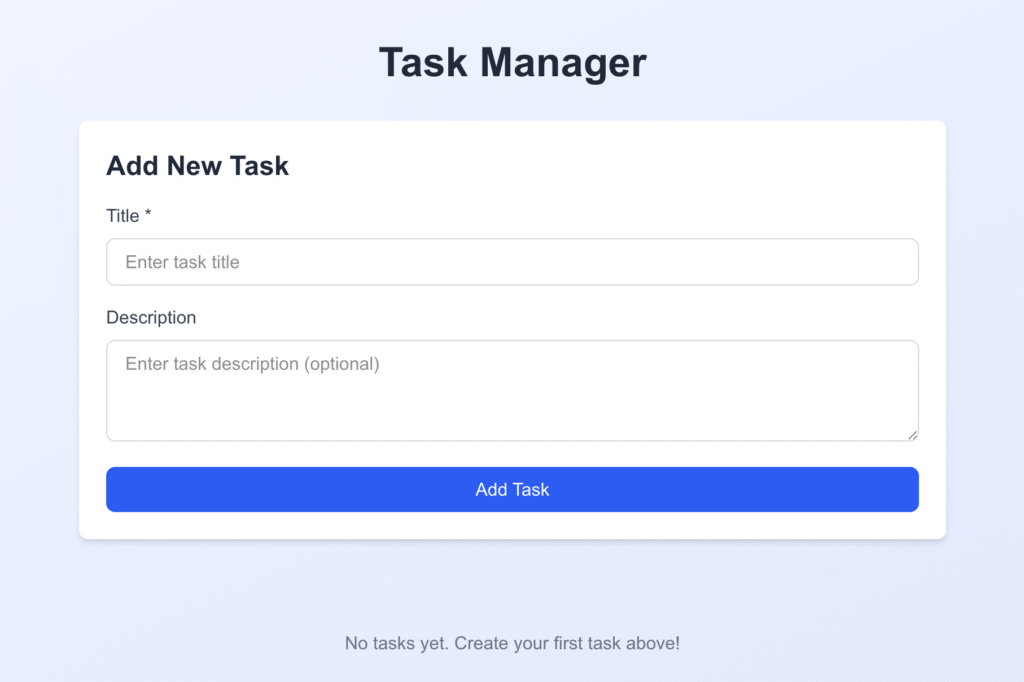
npm run devOpen your browser and navigate to http://localhost:3000. We should see the task manager interface with the form at the top.
Try these interactions:
- Create a task: Fill in the title and optional description, then click “Add Task”. The form should clear and your new task should appear below.
- Toggle completion: Click the checkbox next to any task. It should toggle immediately.
- Delete a task: Click the “Delete” button. After confirming, the task should disappear instantly.
If something doesn’t work, check the terminal for error messages. Common issues:
- Database connection errors: Verify your
DATABASE_URLin.env - Prisma client not generated: Run
npx prisma generate - Port already in use: Kill the process on port 3000 or change it in
package.json
Advanced Features
Input Validation with Zod
Sometimes, we may want to validate input data before processing it.
Let’s install Zod:
npm install zodZod is a small TypeScript library for validation and type safety. It helps us make sure that the data we receive (from forms, APIs, or user input) is exactly what we expect, and not something broken or malicious.
Update app/actions/tasks.ts to include validation:
'use server'

import { prisma } from '@/lib/prisma'
import { revalidatePath } from 'next/cache'
import { z } from 'zod'

const TaskSchema = z.object({
  title: z.string().min(1, 'Title is required').max(100, 'Title too long'),
  description: z.string().max(500, 'Description too long').optional()
})

export async function createTask(formData: FormData) {
  try {
    const rawData = {
      title: formData.get('title'),
      description: formData.get('description') || undefined
    }

    const validated = TaskSchema.parse(rawData)

    await prisma.task.create({
      data: {
        title: validated.title,
        description: validated.description || null
      }
    })

    revalidatePath('/')
    return { error: null }
  } catch (error) {
    if (error instanceof z.ZodError) {
      return { error: error.errors[0].message }
    }
    console.error('Failed to create task:', error)
    return { error: 'Failed to create task' }
  }
}
Zod validates the input and provides clear error messages if validation fails. This prevents invalid data from reaching the database.
With Server Actions, our functions run on the server. However, we still receive data from the browser (via forms or fetch requests). That means users could technically send bad or missing values.
Zod gives us a simple, reliable way to guard against that right where the data enters our server action — no extra backend needed.
Loading States with useFormStatus
In React 19, a new hook called useFormStatus makes handling form loading states much cleaner.
It automatically tracks whether a form is currently being submitted. Therefore we no need to manually manage isSubmitting with useState.
Let’s update our TaskForm to use it.
'use client'

import { createTask } from '@/app/actions/tasks'
import { useRef, useState } from 'react'
import { useFormStatus } from 'react-dom'

function SubmitButton() {
  const { pending } = useFormStatus()

  return (
    <button
      type="submit"
      disabled={pending}
      className="w-full bg-blue-600 text-white py-2 px-4 rounded-lg hover:bg-blue-700 disabled:bg-gray-400 disabled:cursor-not-allowed transition-colors"
    >
      {pending ? 'Adding Task...' : 'Add Task'}
    </button>
  )
}

export default function TaskForm() {
  const formRef = useRef<HTMLFormElement>(null)
  const [error, setError] = useState<string | null>(null)

  async function handleSubmit(formData: FormData) {
    setError(null)
    const result = await createTask(formData)

    if (result.error) {
      setError(result.error)
    } else {
      formRef.current?.reset()
    }
  }

  return (
    <form
      ref={formRef}
      action={handleSubmit}
      className="bg-white p-6 rounded-lg shadow-md mb-8"
    >
      {/* ... rest of the form ... */}

      <SubmitButton />
    </form>
  )
}
We moved the submit button into its own component (SubmitButton) so that it can use the useFormStatus() hook.
This hook tells us whether the form is currently submitting (pending = true).
Conclusion
In this article, we’ve built a complete full-stack application with Next.js 15 and Server Actions—no separate backend required. This approach simplifies development by keeping everything in one codebase while maintaining the security and performance benefits of server-side processing.
All the source code are available on GitHub.