Build Real-Time AI Chatbot with Node.js & OpenAI API 2025
Introduction
Real-Time AI chatbot are everywhere now. From customer support to personal assistants, businesses use them to automate conversations and provide instant help. OpenAI‘s API provides powerful models like GPT that can understand and generate human-like text, making chatbot development accessible to developers.
In this tutorial, w’ll learn how to build a real-time AI chatbot with OpenAI API and Node.js We’ll use Node.js for the backend server, Express.js for handling web requests, Socket.io for enabling real-time bidirectional communication, and OpenAI API for powering the intelligent responses.
Prerequisites
Before we start building the real-time AI chatbot with Node.js and the OpenAI API, make sure we have the following ready:
- Node.js (v16 or higher)
- OpenAI API Key
To check if Node.js is installed correctly, open the terminal and run node:
node --version npm --versionBoth commands should return version numbers.
Project Setup
Step 1: Create Project Directory
First, open the terminal or command prompt and create a new folder for the chatbot project. Then, navigate into that folder and initialize a Node.js project.
# Create a new folder
mkdir ai-chatbot-realtime

# Move into the folder
cd ai-chatbot-realtime

# Initialize a Node.js project with default settings
npm init -y
Step 2: Install OpenAI API Dependencies
Next, we’ll add the necessary dependencies. Run the following command in the terminal:
npm install express socket.io openai dotenv cors- express: lightweight HTTP server for API routes and serving static files.
- socket.io: real-time, bidirectional communication between browser and server.
- openai: official OpenAI Node SDK so we can call the API cleanly.
- dotenv: loads secrets from
.envso you don’t hard-code keys. - cors: lets your frontend talk to your backend from different origins (dev-friendly).
Step 3: Create Project Structure
Create a main server file called server.js, an environment variables file called .env:
touch server.js .env .gitignore

mkdir public
cd public

touch index.html style.css

cd ..
Step 4: Configure Environment Variables
Open the .env file and add the OpenAI API key. The file should look like this:
OPENAI_API_KEY=your_api_key_here
PORT=3000
To get the OpenAI API key, go to platform.openai.com and sign up or log in. Click on API Keys in the left sidebar, then click Create new secret key. Copy the key immediately because we won’t be able to see it again, then paste it into the .env file.
Build the Backend Server
Step 1: Set Up Express Server with Socket.io
Now that the project is ready, let’s create the backend that will handle both the OpenAI API calls and the real-time chat connection.
Open server.js and add the following code:
require('dotenv').config();
const express = require('express');
const http = require('http');
const { Server } = require('socket.io');
const OpenAI = require('openai');

const app = express();
const server = http.createServer(app);
const io = new Server(server, {
  cors: {
    origin: "*",
    methods: ["GET", "POST"]
  }
});

app.use(express.static('public'));

const openai = new OpenAI({
  apiKey: process.env.OPENAI_API_KEY
});

const PORT = process.env.PORT || 3000;

server.listen(PORT, () => {
  console.log(`Server running on http://localhost:${PORT}`);
});
Here we create an Express app, which will handle HTTP requests and serve the frontend files. The app is wrapped in an HTTP server because Socket.io needs direct access to it for real-time connections.
Socket.io is initialized with CORS set to allow any origin (origin: "*") so it works easily during development. In production, always restrict this to your actual domain for security.
app.use(express.static('public')) makes all files inside the public folder (like the HTML and CSS) available in the browser.
Then we set up the OpenAI client, passing in the API key from the environment variable. Finally, the server listens on port 3000, and when it’s running, we’ll see:
Server running on http://localhost:3000Step 2: Store Conversation History
Conversation history is crucial because GPT models are stateless. This means they don’t remember previous messages unless we explicitly send the entire conversation history with each request.
Here, we use a Map to store conversations for each connected user, identified by their unique socket ID
Before the server.listen() line, add this code:
const conversations = new Map();

function initializeConversation(socketId) {
  conversations.set(socketId, [
    {
      role: "system",
      content: "You are a helpful assistant. Keep responses concise and friendly."
    }
  ]);
}
The Map acts like a temporary in-memory database, where each connected user is identified by their unique socket.id. When someone connects, we’ll call initializeConversation() to start their chat with a system message — this defines the assistant’s behavior and tone.
However, do note that, this setup works great for development. But if we plan to scale or persist chats long-term, we’ll want to store conversations in a database such as MongoDB, PostgreSQL, or Redis, because anything saved in memory disappears when the server restarts.
Step 3: Handle Socket.io Connections
Now let’s make the chatbot respond in real time. Add this section below the conversation logic:
io.on('connection', (socket) => {
  console.log(`User connected: ${socket.id}`);

  initializeConversation(socket.id);

  socket.emit('bot_message', {
    message: "Hi! I'm your AI assistant. How can I help you today?",
    timestamp: new Date().toISOString()
  });

  socket.on('user_message', async (data) => {
    try {
      const userMessage = data.message;
      const userConversation = conversations.get(socket.id);

      userConversation.push({
        role: "user",
        content: userMessage
      });

      const completion = await openai.chat.completions.create({
        model: "gpt-4",
        messages: userConversation,
        max_tokens: 500,
        temperature: 0.7
      });

      const botResponse = completion.choices[0].message.content;

      userConversation.push({
        role: "assistant",
        content: botResponse
      });

      socket.emit('bot_message', {
        message: botResponse,
        timestamp: new Date().toISOString()
      });

    } catch (error) {
      console.error('OpenAI API Error:', error);
      socket.emit('bot_message', {
        message: 'Sorry, I ran into an error. Please try again.',
        timestamp: new Date().toISOString(),
        error: true
      });
    }
  });

  socket.on('disconnect', () => {
    console.log(`User disconnected: ${socket.id}`);
    conversations.delete(socket.id);
  });
});
When someone opens our chat app, Socket.io automatically assigns them a unique socket.id. We immediately initialize their chat history and send a friendly welcome message.
When the frontend emits a user_message event, the server:
- Adds the user’s message to their stored conversation.
- Sends the full conversation to the OpenAI API to get a response.
- Adds the assistant’s reply back to the conversation history.
- Sends the reply back to the browser as a
bot_messageevent.
The model parameter specifies which AI model to use. GPT-4 is more capable but costs more. We can use gpt-3.5-turbo for a cheaper alternative.
The max_tokens option limits how long the response can be (useful for cost control).
The temperature parameter controls creativity with 0 gives short, focused answers; 1 makes replies more varied and imaginative.
Lastly, when a user closes their browser or disconnects, their data is removed from the Map to keep memory usage clean.
Build the Frontend
Step 1: Create the HTML interface
Open public/index.html and add this code:
<!DOCTYPE html>
<html lang="en">
<head>
<meta charset="UTF-8" />
<meta name="viewport" content="width=device-width, initial-scale=1.0"/>
<title>AI Chatbot - Real-Time Assistant</title>
<link rel="stylesheet" href="style.css" />
</head>
<body>
<div class="chat-container">
<div class="chat-header">
<h1>AI Assistant</h1>
<span class="status" id="status">Connecting...</span>
</div>
<div class="chat-messages" id="chatMessages"></div>
<div class="chat-input">
<input
type="text"
id="messageInput"
placeholder="Type your message..."
autocomplete="off"
/>
<button id="sendButton">Send</button>
</div>
</div>
<script src="/socket.io/socket.io.js"></script>
<script src="app.js"></script>
</body>
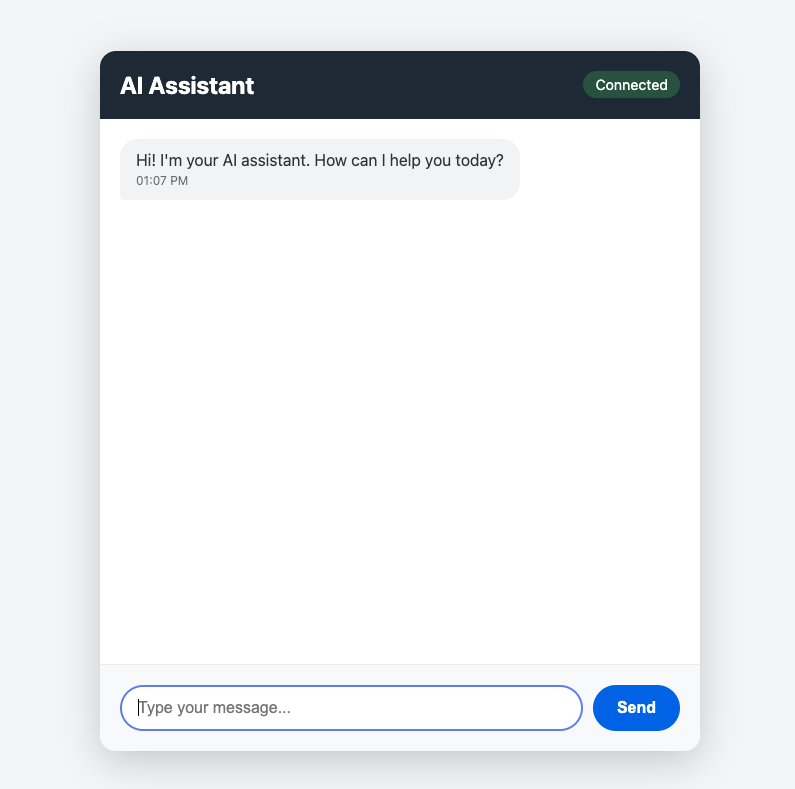
</html>We create a simple chat wrapper with a header, a scrollable messages area, and an input row to demostrate the chat-bot.
In addition, we include the Socket.io client library from /socket.io/socket.io.js. This path is automatically served by the Socket.io server, so we don’t need to download or install anything separately.
Step 2: Add the client-side JavaScript
Create public/app.js and add this code:
const socket = io();

const chatMessages = document.getElementById('chatMessages');
const messageInput = document.getElementById('messageInput');
const sendButton = document.getElementById('sendButton');
const statusElement = document.getElementById('status');

socket.on('connect', () => {
  statusElement.textContent = 'Connected';
  statusElement.style.background = 'rgba(76, 175, 80, 0.3)';
});

socket.on('disconnect', () => {
  statusElement.textContent = 'Disconnected';
  statusElement.style.background = 'rgba(244, 67, 54, 0.3)';
});

function formatTime(ts) {
  const date = new Date(ts);
  return date.toLocaleTimeString('en-US', { hour: '2-digit', minute: '2-digit' });
}

function addMessage(message, isUser = false, isError = false) {
  const messageDiv = document.createElement('div');
  messageDiv.className = `message ${isUser ? 'user-message' : 'bot-message'}`;
  if (isError) messageDiv.classList.add('error');

  messageDiv.innerHTML = `
    <div>${message}</div>
    <div class="timestamp">${formatTime(new Date())}</div>
  `;

  chatMessages.appendChild(messageDiv);
  chatMessages.scrollTop = chatMessages.scrollHeight;
}

function sendMessage() {
  const message = messageInput.value.trim();
  if (!message) return;

  addMessage(message, true);
  socket.emit('user_message', { message });

  messageInput.value = '';
  sendButton.disabled = true;
  sendButton.textContent = 'Sending...';
}

socket.on('bot_message', (data) => {
  addMessage(data.message, false, data.error);

  sendButton.disabled = false;
  sendButton.textContent = 'Send';
  messageInput.focus();
});

sendButton.addEventListener('click', sendMessage);

messageInput.addEventListener('keypress', (e) => {
  if (e.key === 'Enter') sendMessage();
});

messageInput.focus();
When the page loads, the browser automatically connects to our backend using Socket.io. This connection lets messages move instantly between the user’s screen and the server without needing to reload the page.
The script also controls how messages appear in the chat window. The addMessage() function creates a new chat bubble, includes a small timestamp, and automatically scrolls the chat area so the newest message is always visible.
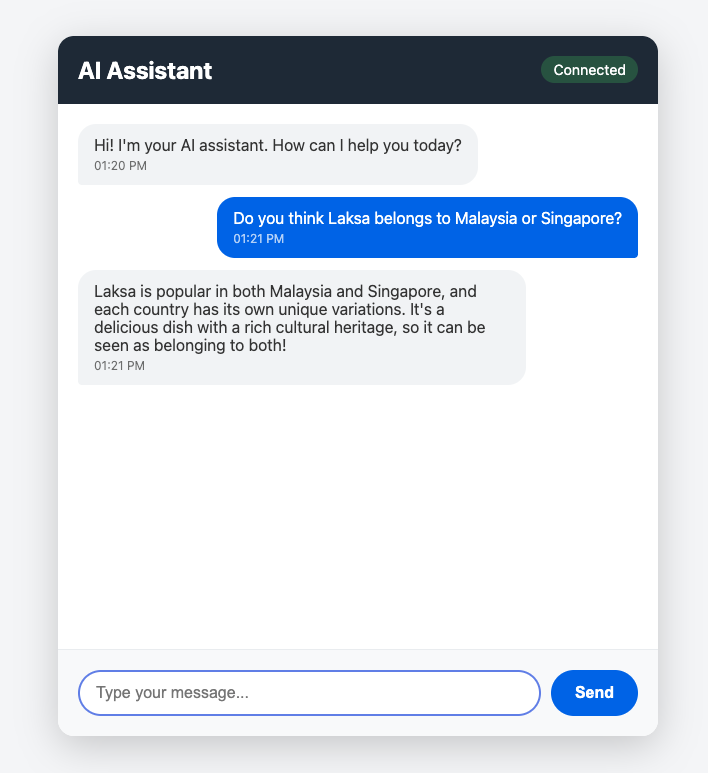
When we send a message, it appears instantly in the chat before the server replies. This is called optimistic UI, and it makes the chat feel smooth and responsive — even while waiting for the AI to think. Once the server sends the bot’s response back, it’s added to the chat on the left side.
Test Your Chatbot
In the terminal, make sure we’re in the project directory and run:
node server.jsIf everything is set up correctly, we should see the message “Server running on http://localhost:3000” in the terminal.
Open a web browser and navigate to http://localhost:3000. We should see the chat interface load with a welcome message from the AI assistant. The status indicator in the header should show “Connected“.
Try having a conversation with your chatbot. Start with simple greetings like “Hello, who are you?” to verify basic functionality.
Advanced Features
Typing Indicator
A typing indicator shows users that the bot is working on a response. This improves the user experience by providing visual feedback during the wait time.
In server.js, we can add this code in the user_message handler before the OpenAI API call:
socket.emit('bot_typing', { isTyping: true });After sending the bot response, add:
socket.emit('bot_typing', { isTyping: false });In public/app.js, add this code:
let typingIndicator = null;

socket.on('bot_typing', (data) => {
  if (data.isTyping) {
    typingIndicator = document.createElement('div');
    typingIndicator.className = 'message bot-message typing';
    typingIndicator.innerHTML = '<div>AI is typing...</div>';
    chatMessages.appendChild(typingIndicator);
    chatMessages.scrollTop = chatMessages.scrollHeight;
  } else {
    if (typingIndicator) {
      typingIndicator.remove();
      typingIndicator = null;
    }
  }
});
This creates a temporary message that says “AI is typing…” which appears while the bot is generating a response and disappears when the actual response arrives.
Message Formatting with Markdown
OpenAI responses can include markdown formatting like bold text, lists, and code blocks. To render these properly, we need to convert markdown to HTML.
Install the marked library:
npm install markedIn server.js, add at the top:
const { marked } = require('marked');Then modify the bot response code:
const botResponse = completion.choices[0].message.content;
const formattedResponse = marked.parse(botResponse);

socket.emit('bot_message', {
  message: formattedResponse,
  timestamp: new Date().toISOString(),
  isHtml: true
});
Update the addMessage() function in public/app.js to handle HTML:
function addMessage(message, isUser = false, isError = false, isHtml = false) {
const messageDiv = document.createElement('div');
messageDiv.className = `message ${isUser ? 'user-message' : 'bot-message'}`;
if (isError) {
messageDiv.classList.add('error');
}
const content = isHtml ? message : message.replace(/</g, '<').replace(/>/g, '>');
messageDiv.innerHTML = `
<div>${content}</div>
<div class="timestamp">${formatTime(new Date())}</div>
`;
chatMessages.appendChild(messageDiv);
chatMessages.scrollTop = chatMessages.scrollHeight;
}Now when the bot uses markdown formatting, it will be rendered properly with bold text, lists, and formatted code blocks.
Rate Limiting
Rate limiting prevents abuse and controls the OpenAI API costs. This is essential for production applications.
Install express-rate-limit:
npm install express-rate-limitIn server.js:
const rateLimit = require('express-rate-limit');

const limiter = rateLimit({
  windowMs: 60 * 1000,
  max: 10,
  message: 'Too many requests, please try again later.'
});

app.use(limiter);
This limits each user to 10 requests per minute. Adjust these numbers based on your needs and budget.
Optimization Tips
One of the cost-saving technique is limiting conversation history. Storing the entire conversation history for long chats can become expensive because we’re sending more tokens with each request. Add this code before calling the OpenAI API:
const MAX_HISTORY = 10;
if (userConversation.length > MAX_HISTORY * 2) {
  userConversation.splice(1, userConversation.length - MAX_HISTORY * 2);
}
This keeps only the system message plus the last 10 message exchanges, which is usually enough context for meaningful conversations.
Response streaming makes the chatbot feel much faster. Instead of waiting for the entire response to be generated, we can stream chunks of text as they’re produced:
const stream = await openai.chat.completions.create({
  model: "gpt-3.5-turbo",
  messages: userConversation,
  stream: true
});

for await (const chunk of stream) {
  const content = chunk.choices[0]?.delta?.content || '';
  if (content) {
    socket.emit('bot_message_chunk', { chunk: content });
  }
}
Caching frequently asked questions can dramatically reduce API calls.
Install node-cache with npm install node-cache, then add caching logic:
const NodeCache = require('node-cache');
const cache = new NodeCache({ stdTTL: 3600 });

const cacheKey = userMessage.toLowerCase().trim();
const cachedResponse = cache.get(cacheKey);

if (cachedResponse) {
  socket.emit('bot_message', {
    message: cachedResponse,
    timestamp: new Date().toISOString()
  });
  return;
}

cache.set(cacheKey, botResponse);
This caches responses for one hour, so identical questions get instant answers without hitting the API.
Conclusion
Here’s a concise conclusion:
Conclusion
In this article, we learned how to build a real-time AI chatbot with OpenAI API from scratch using Node.js, Express, Socket.io, and the OpenAI API. We covered from setting up the development environment to handling real-time bidirectional communication, managing conversation history, and implementing advanced features like typing indicators and response caching.
Now that we have a working chatbot, here are some improvements to consider. Add user authentication with JWT or session tokens so conversations can be saved and retrieved across sessions. Implement a database like MongoDB or PostgreSQL to persist chat history instead of storing it in memory.
For more advanced features, integrate file uploads so users can share documents or images for analysis. Add voice input and output using the Web Speech API for hands-free interaction. Implement analytics to track popular questions and user engagement metrics.
The complete source code for this tutorial is available on GitHub. Feel free to fork it, experiment with different OpenAI models, and customize it for your specific needs. Happy coding!